I Needed a WAF on Top of Nginx Proxy Manager, So I Built One - Corvus
The simplicity of NPM, plus attack blocking, live traffic monitoring and an access queue on one screen. Introducing Corvus, an open-source gateway I built.
I had NPM running on my home server and it was working fine. But once I exposed services to the internet, the logs started to look suspicious..
It started with the logs
If you run a home server or a small service, there's a good chance you use Nginx Proxy Manager (NPM) as your reverse proxy. Enter a domain, pick a container, and a few clicks later you even have a Let's Encrypt certificate. I was using it happily for exactly that simplicity.
But once you expose a service, it doesn't take long before requests like these show up in the logs.
GET /.env
GET /wp-config.php
GET /../../etc/passwd
GET /?id=1 UNION SELECT password FROM users
GET /.env
GET /wp-config.php
GET /../../etc/passwd
GET /?id=1 UNION SELECT password FROM usersI don't run WordPress and there's no .env to find, but scanners knock every single day. Very diligent..
Having had a server compromised before (crypto miner incident), logs like these didn't feel like someone else's problem. So I started thinking:
I want to see what requests are coming in, block the obvious attacks, and have a bit of control when traffic spikes.
The usual approach
There are two common ways to add security to NPM.
1. NPM + a blocking tool like CrowdSec - analyzes logs and blocks bad IPs.
2. A WAF container in front of or behind NPM - SafeLine, BunkerWeb, ModSecurity, etc.
Both are good tools. But you end up with more containers and more settings screens, and to find out where a request was blocked you have to jump between several places.
I wanted to handle proxying and security together on a single, simple screen like NPM. So I just built it.
Corvus
It's a gateway that takes an NPM-style reverse proxy and adds features to monitor, block, and control traffic. It's not an NPM fork; I built it from scratch (OpenResty + Go + React).
It's Apache-2.0 open source, with no paid features.
Proxy hosts, automatic Let's Encrypt renewal (including DNS challenge for wildcards), redirects, TCP/UDP streams
Known attack patterns (SQL injection, path traversal, scanners, etc.) blocked as soon as you add a host
Automatic blocking of repeat-offender IPs
Security rules by IP, country, path, header and User-Agent, browser challenge, automatic attack mode
An access queue that only lets in as many visitors as you have capacity for during traffic spikes
Live traffic monitor and Slack, Discord, Teams, Telegram notifications
Import existing NPM configuration, versioned config history and rollback
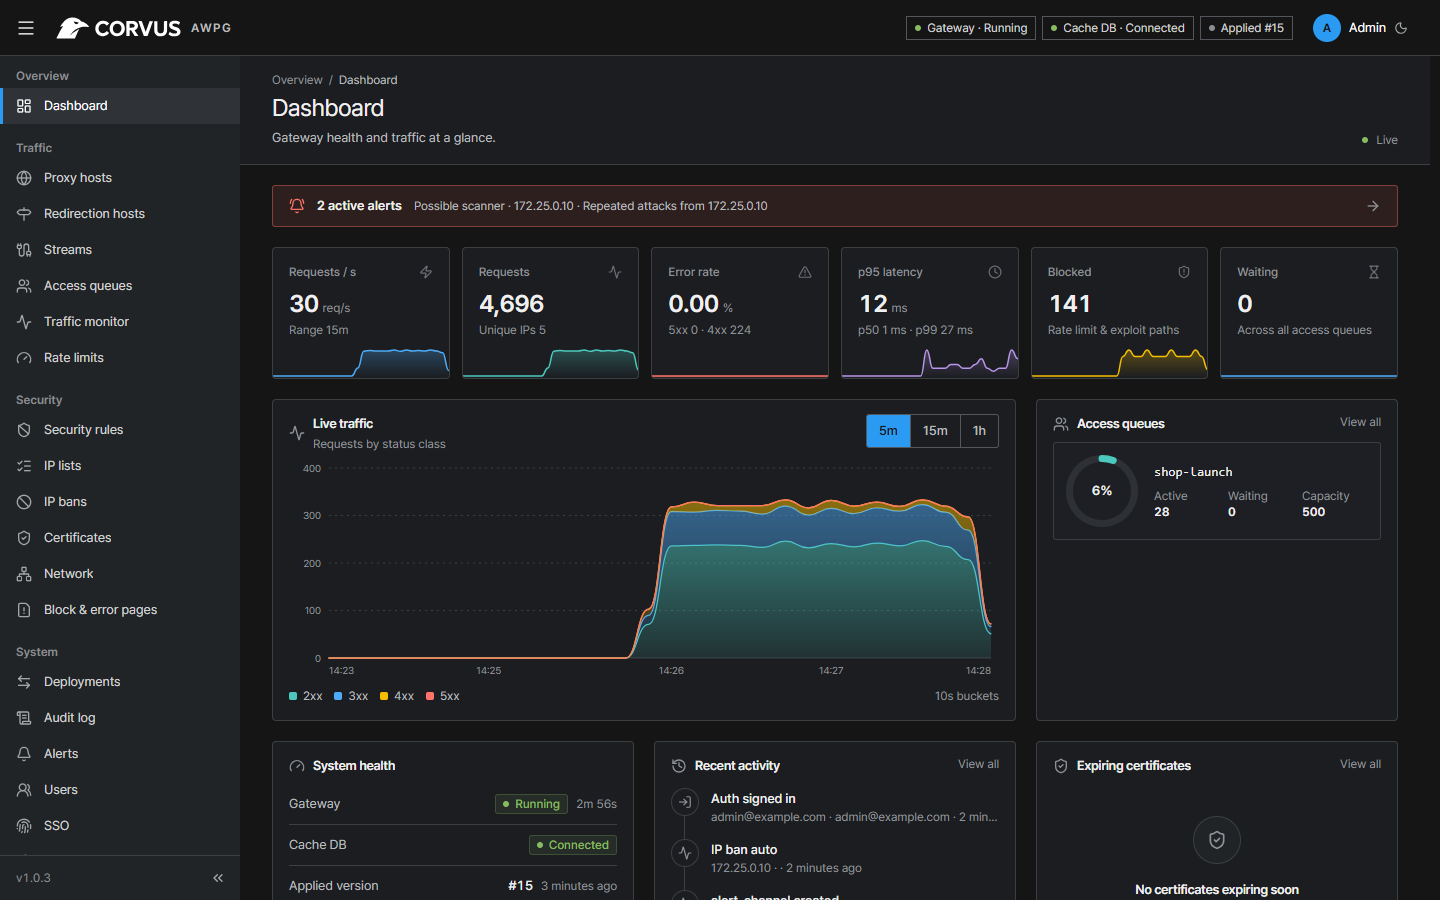
Installation: 5 minutes
services:
  corvus:
    image: 'ghcr.io/corvus-gateway/gateway:latest'
    restart: unless-stopped
    ports:
      - '80:80'
      - '443:443'
      - '9443:9443'
    volumes:
- ./data:/dataservices:
corvus:
image: 'ghcr.io/corvus-gateway/gateway:latest'
restart: unless-stopped
ports:
- '80:80'
- '443:443'
- '9443:9443'
volumes:
- ./data:/datadocker compose up -ddocker compose up -dOn first start, a one-time setup token is printed to the logs. It makes sure only the server owner can create the admin account.
docker compose logs corvus | grep setup_tokendocker compose logs corvus | grep setup_tokenOpen https://SERVER-IP:9443 (you'll get a browser warning because of the self-signed certificate), enter the setup token, create an admin account, and you're done. There is no default password.
What you get just by adding a host
In Proxy Hosts → Add, enter a domain and target container (e.g. shop-web:80), choose Let's Encrypt under TLS, and save. Up to this point it's the same as NPM.
The difference is that protection is on from the moment you save, without writing any rules.
Known attack path blocking
On by default. All four requests above (config file probing, path traversal, SQL injection) are blocked before they reach the app.
Automatic blocking
Also on by default. An IP that trips the rules more than 20 times in 10 minutes is blocked for 15 minutes, and the block doubles each time it happens again (up to 7 days by default).
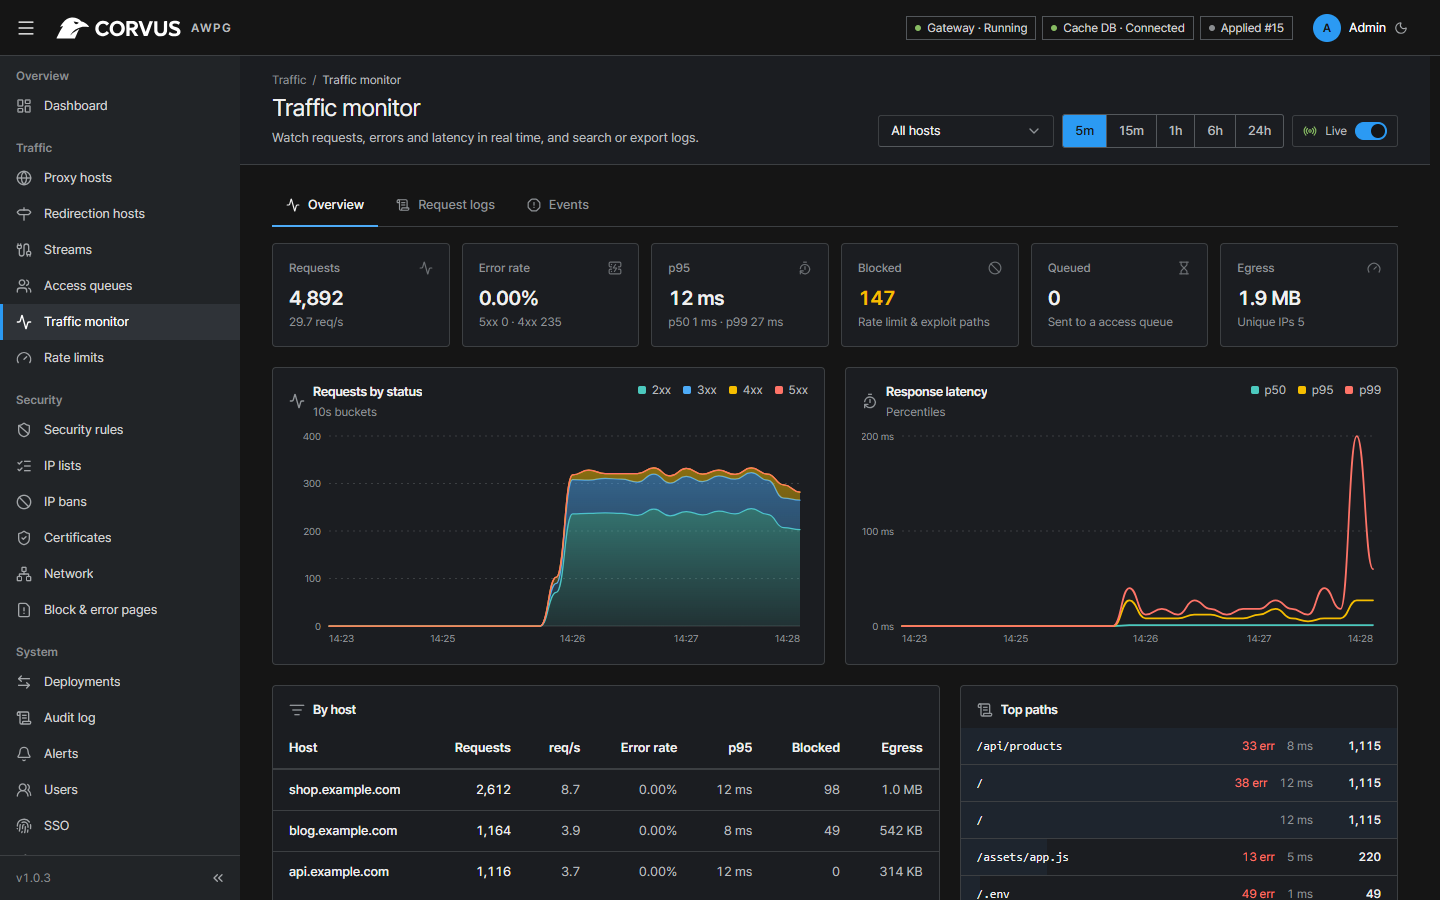
Traffic monitor
Every request lands in the traffic monitor, so you can see what's coming into which host on which path, and what got blocked, all in one place.
When you want more
These are for when the defaults aren't enough. All optional.
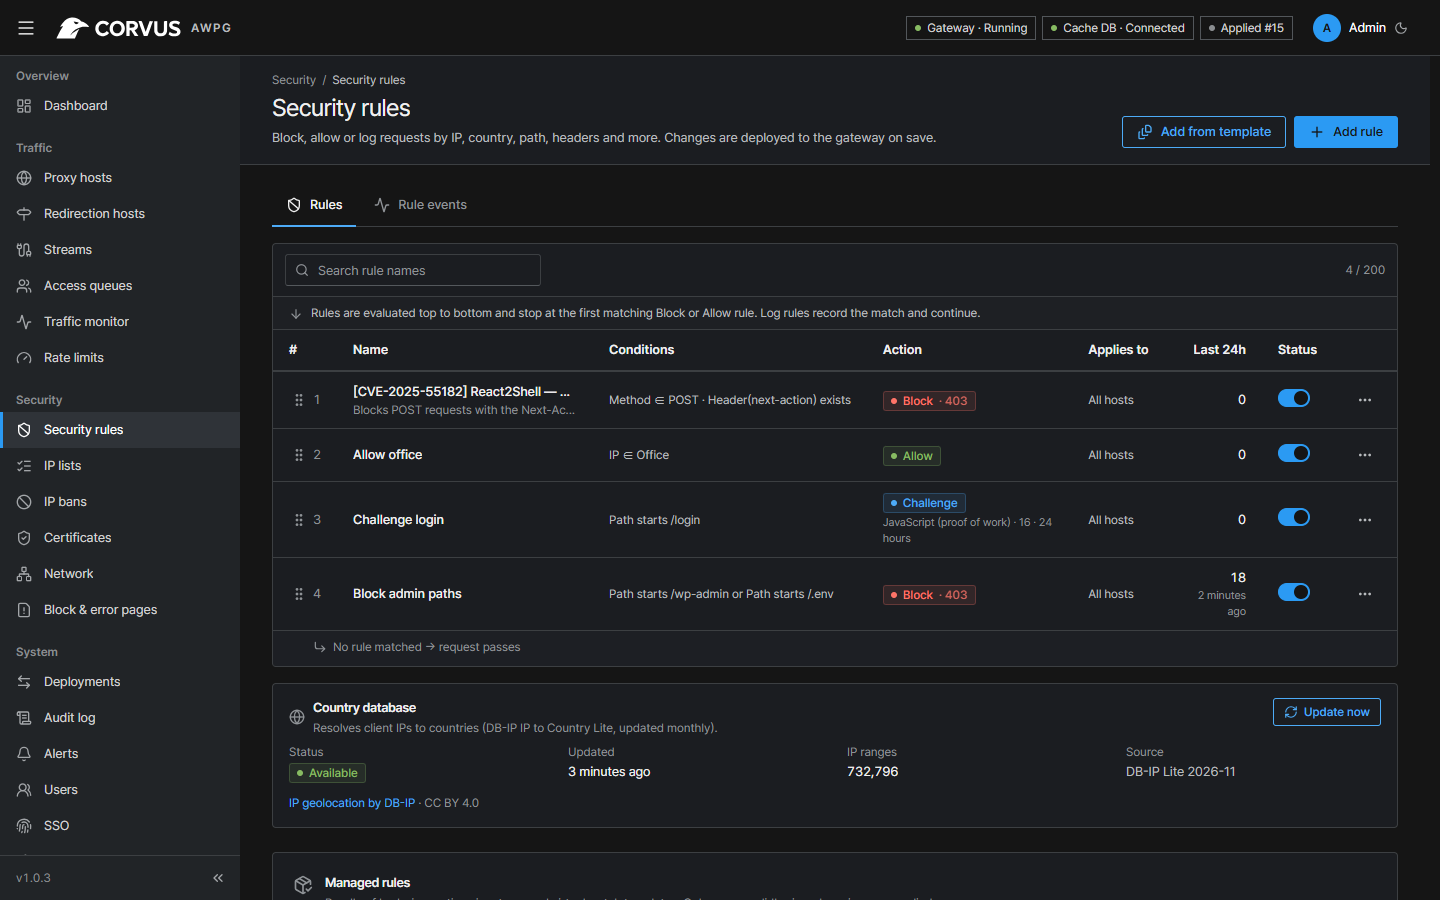
Security rules - things like "allow
/adminonly from the office IP" or "block a specific country". It's safest to start with the Log action, see what matches, then switch to Block.Browser challenge - without any external service, only visitors whose browser passes a short computation (proof of work) are let in. Useful when bots swarm.
Attack mode - when requests per second or the block ratio exceed a threshold, a challenge is automatically applied to all visitors.
Access queue - for crowds like first-come-first-served events, it lets in only up to capacity and the rest wait in line. Basically, you only take what your server can handle.
Migrating from NPM
With NPM Import you can bring over proxy hosts, redirects, streams, certificates and access lists as they are.
NPM's files and database are only read, so if you don't like it, you can just go back to NPM. The steps are in the docs.
Good to know
1. It's still an early version (1.1.0). If something is inconvenient or odd, please open an issue - I'm fixing things as fast as I can.
2. When many people share one IP, like corporate or carrier NAT, they may get blocked together. Add networks you know to Trusted Networks.
3. A large DDoS that saturates the server's link can't be stopped by a single gateway. For that, put a CDN like Cloudflare in front; Corvus still recognizes real visitor IPs behind it.
Wrapping up
I built this making heavy use of Claude Code, while handling the design, verification and testing myself, one piece at a time.
There are surely rough edges. If you install it and tell me what's inconvenient or what features you need, it would help a lot.
GitHub: https://github.com/corvus-gateway/corvus
Docs: https://corvus-gateway.github.io/corvus/